

Meet Exasol Personal: Your Local AI Data Analyst, Running Locally

Everyone wants to point an AI at their data. Almost nobody wants to hand their data to an AI.
That hesitation is fair. The moment your data leaves your machine, you trade a problem you understand for one you don’t, and for the data that actually matters, that trade is usually a dealbreaker. So most people never get past the demo.
Exasol Personal closes that gap by flipping the arrangement: instead of sending your data to the AI, you run the database locally and bring the AI to it. Everything stays on your machine, the assistant connects through a dedicated read-only login, and you can ask it to show every query it writes before you trust a single answer.
Installation takes three steps: install, connect, and ask your first question. Let’s get you there first, then look at how it works.
Install
One command sets up the local database, sample datasets, MCP server, client integration, and configures it for you: the local database, the AI connection, the sample data, all of it. You don’t have to wire anything together.
bash

curl -fsSL https://raw.githubusercontent.com/exasol-labs/exasol-personal-local-starterkit/main/install.sh | sh
On macOS the database comes up natively, with no Docker, usually in under two minutes. It includes three sample datasets already loaded, so there’s something real to ask about the moment it finishes.
Connect your AI assistant
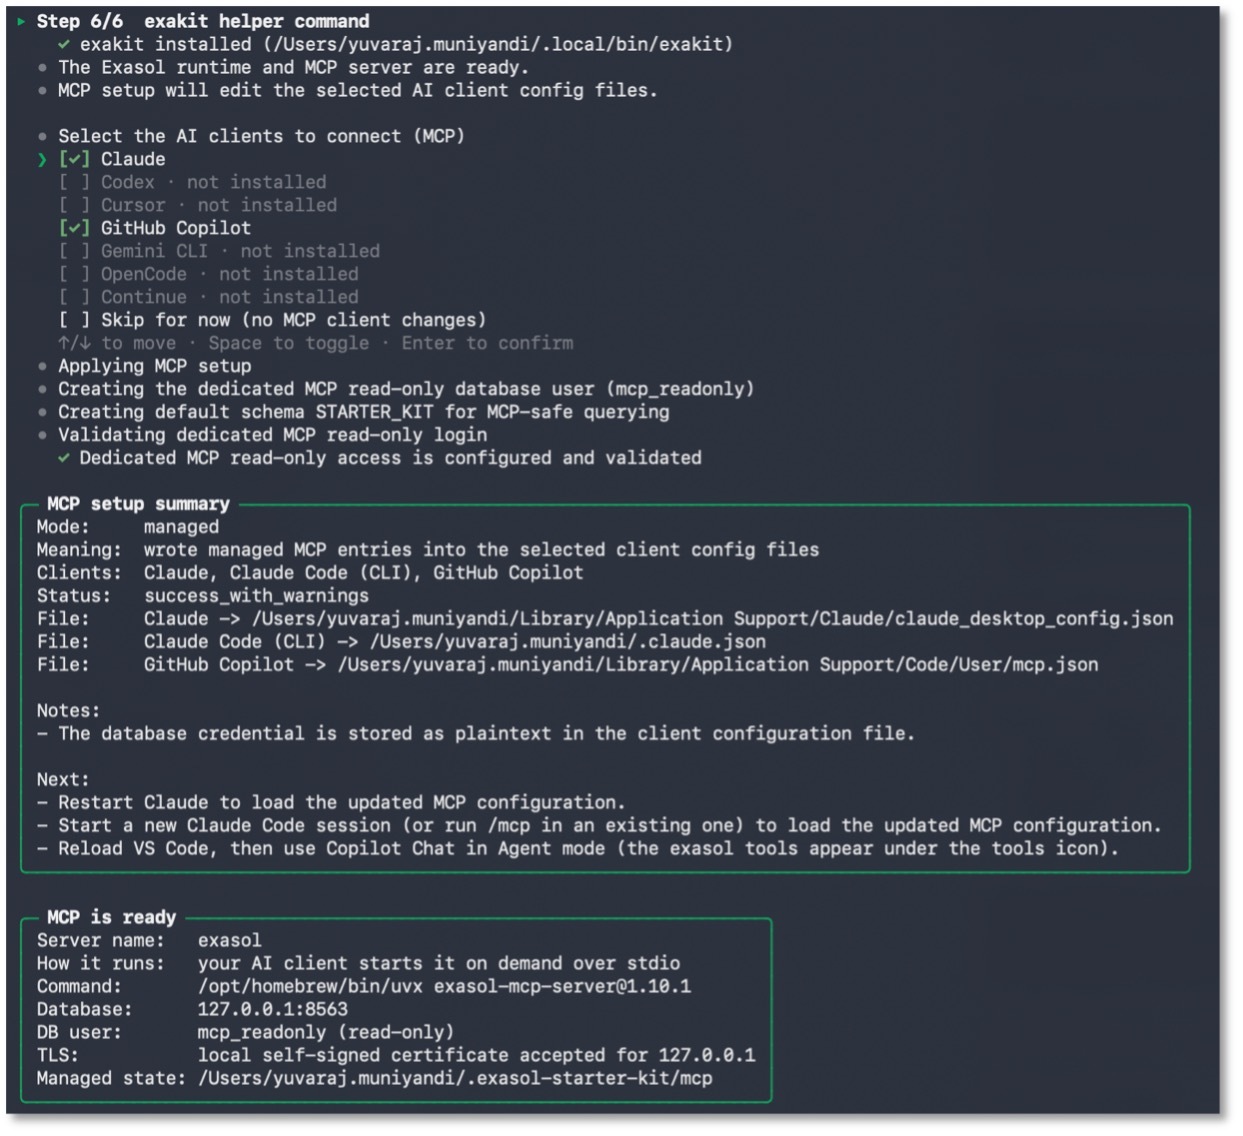
Near the end, the installer offers to wire up the AI clients on your machine. It shows a checklist; Claude, Codex, Cursor, Gemini CLI, GitHub Copilot with the ones you actually have installed pre-selected and the rest greyed out. It backs up each client’s config before touching it, then writes the connection in for you.
Here’s what it sets up under the hood, and it’s worth seeing plainly because it’s the whole safety story:
MCP is ready
  Server name:  exasol
  Database:     127.0.0.1:8563
  DB user:	    mcp_readonly (read-only)
Your assistant connects to a local database as a dedicated mcp_readonly user. Restart the client, look for an MCP server named exasol, and you’re ready. The installer even copies a first prompt to your clipboard to get you started.
Ask your first question
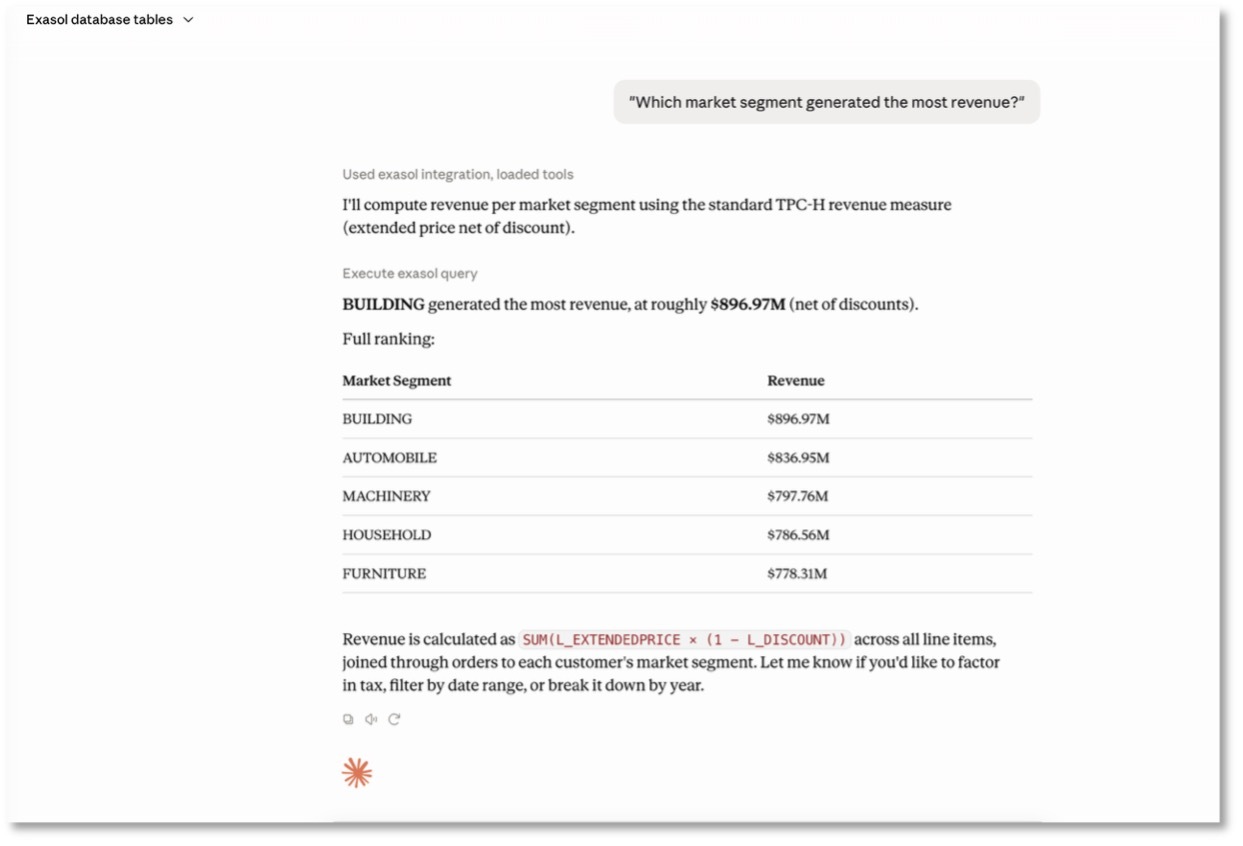
This is the moment worth seeing. Ask a question in plain English:
“Which market segment generated the most revenue?” Your assistant reads the schema, writes the SQL, runs it against the local database, and answers in seconds.
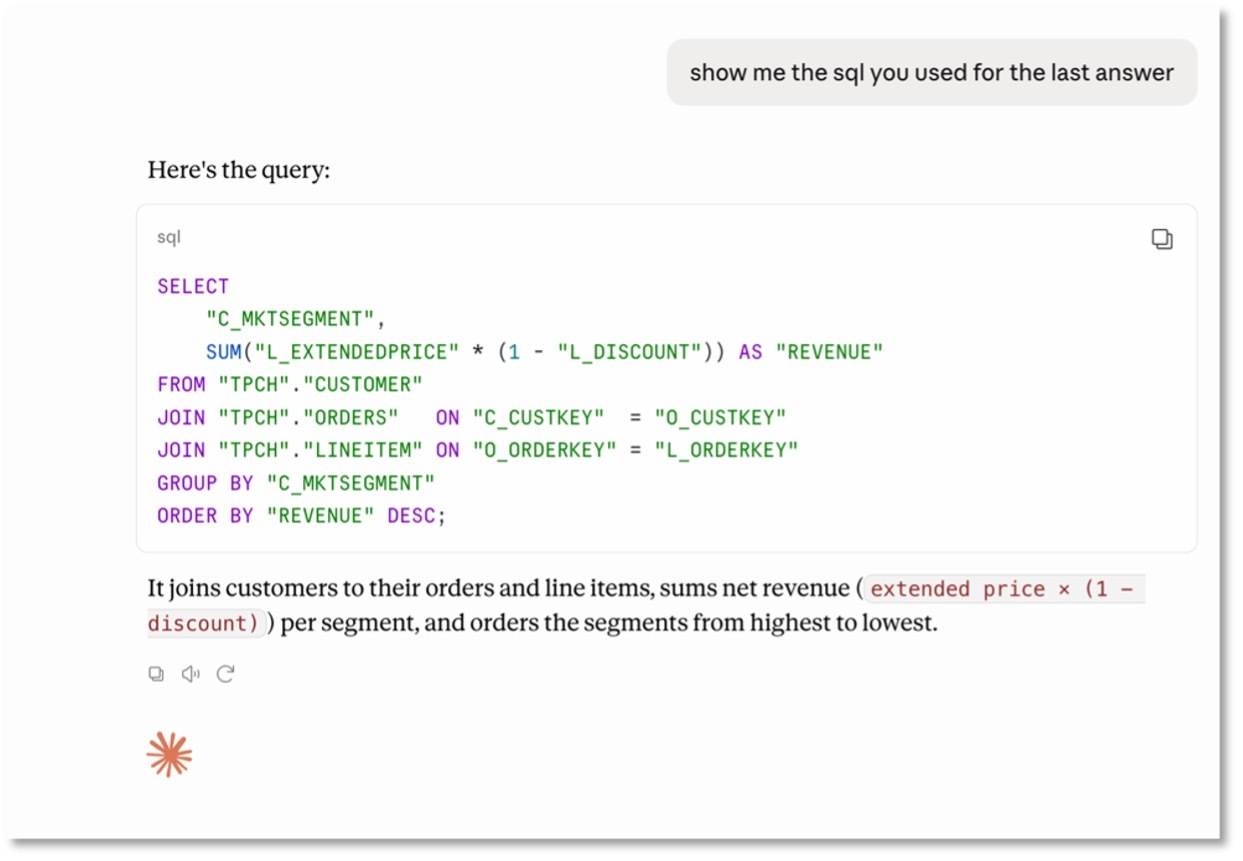
And when you want to see its work, just ask “show me the SQL you used.” It hands back the exact query it ran, so you can read it, trust it, or check it yourself in a SQL client like DBeaver.
That habit is the point: ask, inspect the query, and verify the result.
Try these prompts
Once you’re connected, here are questions you can ask right away against the bundled data. Copy, paste, explore:
Retail data (TPC-H)
- “Which market segment generated the most revenue?”
- “Show me total orders by year.”
- “Who are the top 10 customers by total order value?”
- “Which region has the highest average order value?”
Energy data
- “What’s the average meter reading by month?”
- “Which meters show the biggest jump in usage over time?”
Weather data
- “Which cities are the hottest and coldest in the dataset?”
- “How does daily temperature vary across the year for one city?”
Cross-cutting
- “Show me the SQL you used for that last answer.”
- “What schemas and tables are in this database, and how do they relate?”
Now bring your own data.
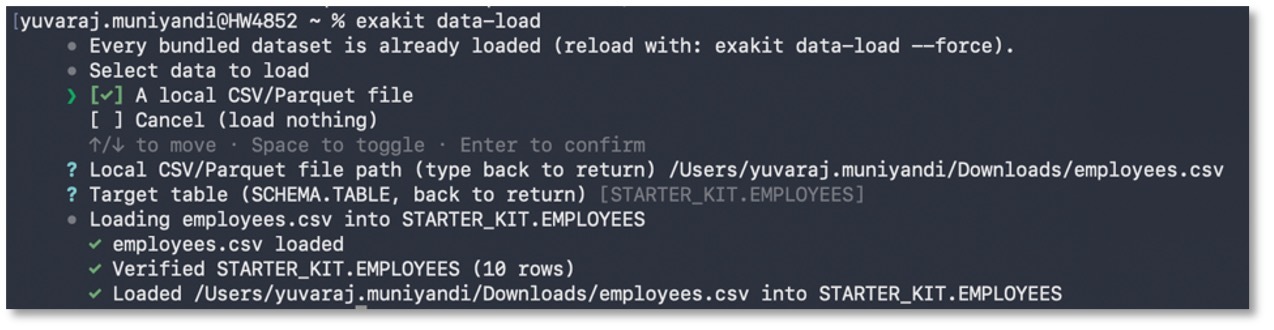
The sample data is the warm-up. The main benefit is your data. Loading a CSV or Parquet file is one command:
bash

exakit data-load
Your own uploads land in the STARTER_KIT schema by default, ready to query the moment they finish loading. From there, every prompt above works on your own tables; same plain-English questions, same inspectable SQL, now against data that’s actually yours. This is the point where most people stop treating it as a demo and start using it for real work.
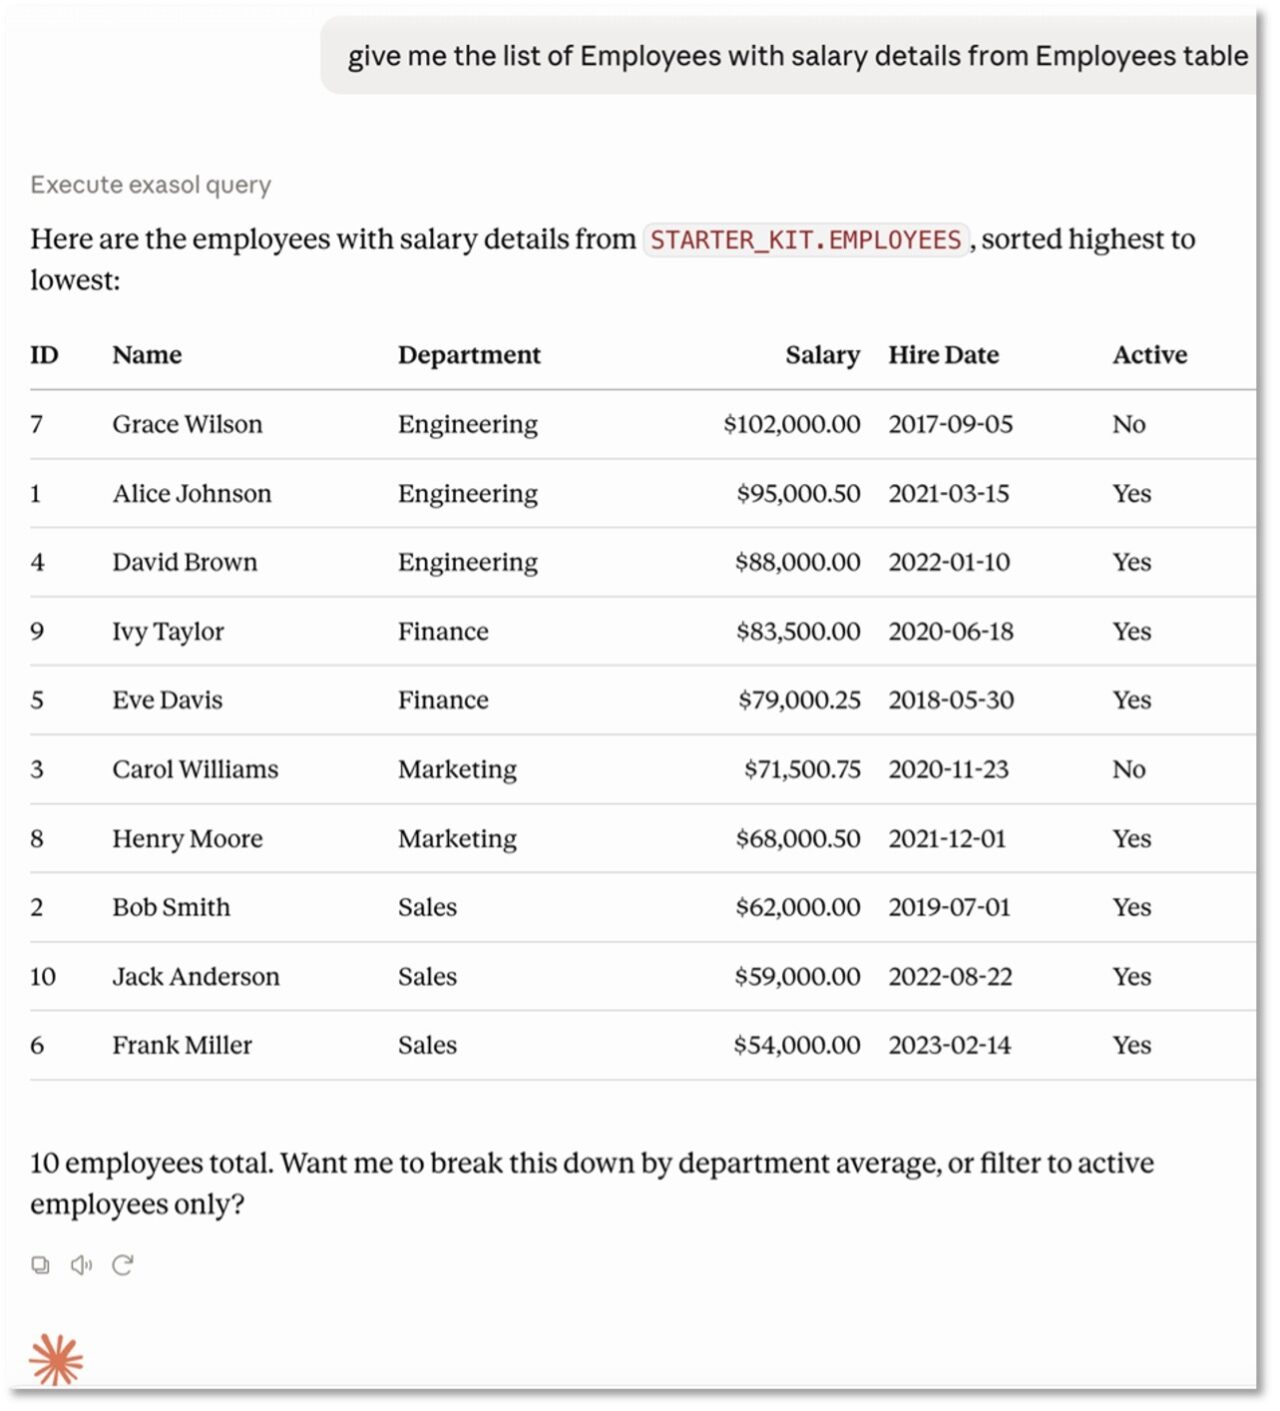
What you can build next
Once you’re comfortable asking questions, the same setup becomes the foundation for more.
Build an AI data analyst that explores a fresh dataset with you. You load it, then ask what’s interesting, what’s trending, what looks off, and let the assistant do the digging.
Build a SQL assistant that writes and explains queries against your schema. You describe what you want in words and get correct SQL back. It helps whether you’re learning SQL or just tired of writing joins by hand.
Build an analytics copilot for recurring work. Point it at the same tables each week and ask for the numbers you always need, without rebuilding a dashboard.
All of it runs on the same local database and read-only connection you already set up. There’s nothing more to install.
Why this is safe by design
Now the part that makes all of the above something you can do without a second thought.
Your data never leaves your machine. The AI does the reasoning; the database holds the data locally and ships it nowhere. And the assistant connects through the dedicated mcp_readonly login you saw during setup it can read everything and change nothing, a limit enforced by the database itself, not by trusting the model to behave. You don’t have to catch every query for it to be safe; the read-only permissions make write and delete operations impossible.
Two honest details, because this is a trust story and trust runs on candor. The database credential is written into your AI client’s local config file in plaintext; it lives on your own machine, but it isn’t encrypted at rest, so treat your laptop as the security boundary it is. And the local connection uses a self-signed certificate for 127.0.0.1, which is exactly right for a local setup and not something you’d carry over unchanged to a remote database.
Under the hood there are just three parts: your local Exasol database holds the data, the MCP server gives the AI a read-only door and turns each question into inspectable SQL, and your AI client does the reasoning. Notably absent from that picture is any pipe carrying your rows to someone else’s server.
Where it goes from here
Running Exasol Personal locally is the starting point, not the ceiling. It’s built to get you productive on your laptop today, and the same workflow carries forward as your needs grow, toward larger Personal and production deployments. Start where the friction is lowest, and scale when you’re ready.
Start now
You’re four steps from your own local AI data analyst:
- Run it:
curl -fsSL https://raw.githubusercontent.com/exasol-labs/exasol-personal-local-starterkit/main/install.sh | sh - Connect your AI client when the installer offers, and restart it.
- Ask your first question against the sample data, then load your own CSV with
exakit data-load. - Explore the full setup, guides, and source on GitHub.
Get the Starter Kit on GitHub and go ask your first question.
Exasol Personal is free for personal use, and running it locally keeps everything on your own machine.